How to Document and Present a Python Project
There is a specific, uncomfortable moment every beginner hits: you finish a small project, you feel good about it, and then you imagine handing it to…

Key topics
Your script runs. That is not the same as your project being finished.
There is a specific, uncomfortable moment every beginner hits: you finish a small project, you feel good about it, and then you imagine handing it to someone else. A friend. A reviewer. A hiring manager. They open the folder. They see files. They have no idea where to start.
That gap between "it works on my machine" and "someone else can run it" is what documentation closes. And the fix is smaller than you think. You do not need a documentation site, a wiki, or a tool. You need a README that answers four questions, and you need to actually test it.
Let's make your project reviewable.
Why a Working Script Still Looks Broken to a Reviewer
Here is what a reviewer sees in the first thirty seconds: a folder of files with no entry point. No instructions. No indication of what the code does or how to run it.
They ask three questions, in this order:
- What does this do?
- How do I run it?
- What should I expect to see when it works?
If your project does not answer all three, the reviewer stops. Not because they are lazy, but because they have no path forward. They cannot judge code they cannot run.
This is the mental shift worth making: the reviewable unit is not your code. It is your code plus a path to run it. Documentation is not decoration you add at the end. It is the interface between your code and another person's machine.
There is a narrow case where none of this matters. If you wrote a throwaway script that only you will ever run, on your machine, for one task, a README is overhead. Skip it. But the moment someone else needs to run your project — for a class, a portfolio, a code review, a job application — that overhead becomes the deliverable. The code alone is not enough.
The Smallest README That Actually Works
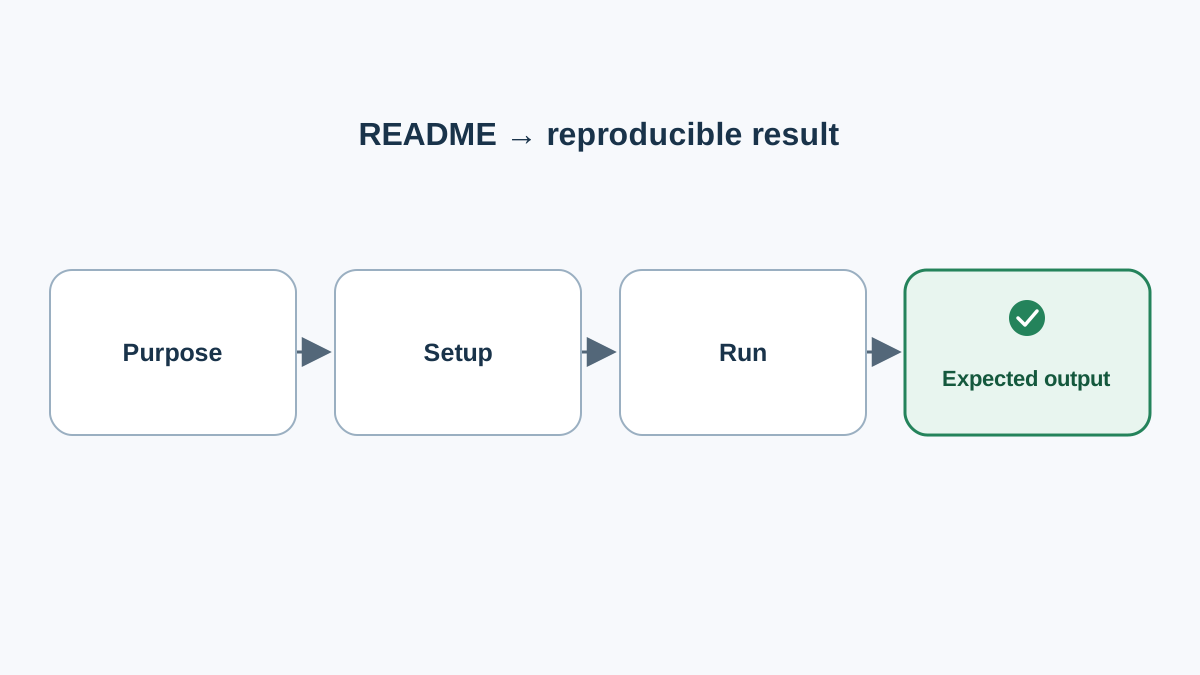
A README is a plain text file named README.md that sits at the root of your project folder. The .md means Markdown, a simple formatting language that renders nicely on most code-hosting platforms. You can write it in any text editor. No tooling required.
Here is the smallest version that works. Four blocks, in this order:
# Line Counter

Counts the number of lines in a text file and prints the total.

## Setup

Requires Python 3.10 or newer. No third-party packages.

## Run

python count_lines.py sample.txt

## Expected output

sample.txt has 3 lines.
That is it. Purpose, setup, run, expected output. Four blocks. A reviewer can read this in fifteen seconds and know exactly what to do.
Notice the expected output block. It shows the real terminal output, not a paraphrase. "Prints the line count" is a description. sample.txt has 3 lines. is evidence. Reviewers trust evidence.
Rule of thumb: if a reviewer cannot run your project using only the README, the README is not finished.
You can add more later — a license, a changelog, a TODO section. But start with these four blocks. They carry most of the weight.
Write the Purpose Statement First
The purpose statement is one or two sentences at the top of the README. It determines whether the reviewer keeps reading.
Write it for someone who has never seen your project. No internal shorthand. No unexplained domain terms. Name the problem the script solves, not the technology it uses.
Here is the difference between a weak version and a strong one:
| Weak | Strong |
|---|---|
| A script for processing files. | Renames every .txt file in a folder by adding a date prefix and prints a summary of what changed. |
| A tool for CSV data. | Reads a CSV, removes rows with missing email addresses, and writes a cleaned copy to a new file. |
| Log analysis utility. | Counts how many times each error type appears in a log file and prints the top five. |
The weak versions describe a category. The strong versions describe a behavior. A reviewer reading the strong version knows immediately whether your project is relevant to them.
Common mistake: writing the purpose statement for yourself. You already know what the project does, so you leave out the context that a stranger needs. Read your purpose statement as if you have never seen the code. If any sentence requires prior knowledge, rewrite it.
Knowledge check
Check your understanding
Answer this question before you continue.
Setup and Run Instructions That Reproduce
This is where most beginner projects break. The instructions work on your machine because your machine already has the right Python version, the right packages, and the right file paths. A reviewer's machine does not.
Your setup and run instructions need to reproduce the result on a clean machine. That means four things:
State the Python version you tested with. "Requires Python 3.10 or newer" is enough. If you used a specific feature that needs a newer version, say so.
List any third-party packages. If your script uses only the standard library, say that explicitly. "No third-party packages" is useful information — it tells the reviewer there is nothing to install.
Give the exact install and run commands, in order. If there is an install step, show it. If there is not, say so. Then show the exact command to run the script.
Show the file layout. A short tree tells the reviewer where to put things:
my-project/
├── count_lines.py
├── sample.txt
└── README.md
If your project has dependencies, a virtual environment keeps them isolated from the rest of your system. A virtual environment is a self-contained folder where Python packages live for one project only. You create one, activate it, and install your packages there. This prevents the classic problem where your script works because of a package version that happens to be installed globally on your machine.
python -m venv venv
source venv/bin/activate
pip install -r requirements.txt
On Windows, the activation command is venv\Scripts\activate instead. The requirements.txt file lists your packages, one per line. If you have no dependencies, you do not need any of this — just say "no third-party packages" and move on.
Common mistake: instructions that only work because of something already installed on your machine. If you cannot explain why your script runs, a reviewer cannot reproduce it. A virtual environment or a requirements file removes that hidden dependency.
Knowledge check
Check your understanding
Answer this question before you continue.
Show One Verified Example, Not Five Untested Ones
One example you have actually run beats five you have not.
Pick the smallest input that demonstrates the core behavior of your project. Run it yourself. Copy the output verbatim. Note the exact command you used.
Here is a complete, runnable example. First, the script:
import sys

def count_lines(path):
    with open(path, "r", encoding="utf-8") as f:
        return sum(1 for _ in f)

if __name__ == "__main__":
    path = sys.argv[1]
    print(f"{path} has {count_lines(path)} lines.")
Next, the input file. Save this as sample.txt:
first line
second line
third line
Then run the command:
python count_lines.py sample.txt
And here is the output you should see:
sample.txt has 3 lines.
Everything is visible: the script, the input, the command, and the result. A reviewer can reproduce this in under a minute. That is what "verified" means — not that you believe the output is correct, but that you ran it and the output matched.
The reason this matters: reviewers test your example. They run the command. They compare the output. If your example does not work, they stop trusting everything else in the README — the setup instructions, the purpose statement, the limitations. A broken example destroys trust faster than no example at all.
Warning: never paste output you did not produce. Do not write what you think the output should be. Run the command, copy what appears, paste it in. If the output is long, show the first few lines and write "output truncated" so the reviewer knows.
Knowledge check
Check your understanding
Answer this question before you continue.
State Limitations and Known Issues Honestly
Beginners often skip this section because it feels like admitting weakness. It is the opposite. Limitations are evidence of engineering judgment.
A limitations section tells the reviewer what your project does not handle. That is useful information. It prevents them from trying your script on a file type it was never designed for and concluding that it is broken.
Write limitations as plain statements:
- Only handles
.txtfiles. Other file types are ignored. - Assumes the file is UTF-8 encoded. Other encodings may produce errors.
- Does not handle files larger than available memory.
- Tested on macOS and Linux only. Windows behavior is untested.
Keep two categories separate. Limitations are intended boundaries — cases your project was never designed to handle, like the list above. Known issues are reproducible defects — cases your project should handle but currently does not. A limitation says "this is out of scope." A known issue says "this is a bug I have not fixed yet."
Here is the difference in practice:
## Limitations

- Only handles `.txt` files. Other file types are ignored.
- Tested on macOS and Linux only.

## Known issues

- Files with a UTF-8 BOM report one extra line. Workaround: strip the BOM before running.
Both belong in the README, but they mean different things to a reviewer. A limitation tells them what not to try. A known issue tells them what to watch for. Mixing the two makes a reviewer unsure whether your project is incomplete by design or broken by accident.
A short TODO section is a feature, not an apology. It shows the reviewer where the project is going:
## TODO

- Add support for `.md` and `.csv` files
- Handle encoding detection automatically
- Add a `--verbose` flag for per-file output
Honest limitations make the rest of your claims more credible. A reviewer who sees "tested on macOS and Linux only" trusts your setup instructions more, not less.
Knowledge check
Check your understanding
Answer this question before you continue.
Describe Your Contribution Clearly
If your project is part of a portfolio, a reviewer is trying to assess your skills. They need to know what you built.
One short paragraph is enough. This is not a résumé.
If you followed a tutorial or started from a template, say so. Name what you changed or added. "I followed a tutorial for the basic file-reading loop and added date-prefix logic, collision detection, and a summary printout" tells the reviewer exactly what to evaluate.
If you wrote it from scratch, say that plainly. Describe the parts you found hardest. "I wrote this from scratch. The trickiest part was handling filename collisions when two files would get the same date prefix" gives the reviewer a specific thing to look at in your code.
This matters most when the project is part of a portfolio. A reviewer who knows what you built can judge your actual work. A reviewer who does not know has to guess, and guessing usually means moving on.
Present the Project Beyond the README
Once your README works, you can present the project in person or in a portfolio entry. Here is a two-minute walkthrough that covers everything a reviewer needs:
- Purpose — one sentence: what it does and what problem it solves.
- Run it live — open a terminal, run the command from your README, show the output.
- Show one result — point at the output and explain what it means.
- Name one limitation — say what the project does not handle and what you would add next.
That structure works for a job interview, a class presentation, or a portfolio description. It is short, concrete, and honest.
A README is enough for most first projects. You need more when other people will call your functions directly — then docstrings become useful. A docstring is a short description placed inside a function that explains what it does, what arguments it takes, and what it returns. Python's built-in help() function reads docstrings, so anyone importing your code can see the explanation without opening the source file.
Docstrings are the natural next step, not a requirement for a first reviewable project. Keep the scope small. One clear README beats a half-finished documentation site every time.
Practice: Document Your Own Project
Take the last project you finished — a file renamer, a CSV cleaner, a to-do list, a log analyzer — and write a README with the four required blocks:
- Purpose statement
- Setup instructions
- Run command
- Expected output
Then test it. Copy your project folder to a new location, or create a fresh virtual environment, and follow your own instructions exactly as written. Fix whatever breaks. Something will break. That is the point.
Stretch goal: add a limitations section and one TODO item. Then hand the README to someone else and watch where they get stuck. That spot is your next edit.
A project is not finished when the code runs. It is finished when someone else can run it. Write the four blocks tonight, test the instructions on a clean environment, and let the first person who tries your project succeed without asking you a single question.
Knowledge check
Final check
Finish the article by checking the ideas you just learned.
References
Want a more structured Python path?
Use the Python Starter Pack to turn scattered tutorials into a focused practice path.
Python for Artificial Intelligence Starter Pack
Build a Python foundation you can actually use. The Python for AI Starter Pack brings together a guided path through setup, core programming concepts, data structures, files, JSON, APIs, debugging, and practical projects—so you can move quickly from running your first program to understanding and building useful software.
- 264-page illustrated PDF
- 12 guided Python chapters
- Visual concept diagrams
- Self-assessment quizzes
- Bonus deep-dive sections
- Files, JSON, APIs, debugging & projects
- Foundation for data, automation & AI
Coming soon


