How to Install Python Packages with pip in a Virtual Environment
You ran pip install requests. The terminal said Successfully installed. Then your script said ModuleNotFoundError: No module named 'requests'.

Key topics
You ran pip install requests. The terminal said Successfully installed. Then your script said ModuleNotFoundError: No module named 'requests'.
Nothing is broken. You installed the package into a different Python than the one running your code.
That is the whole problem, and it is worth understanding before you type another command. pip is a delivery driver. It does not decide where packages go — it delivers to the address of whichever Python interpreter it is attached to. If that interpreter is your system Python, or another project's environment, the package lands there. Your project never sees it.
So the real skill is not memorizing install commands. It is controlling the address. This guide assumes you have already created and activated a virtual environment for your project. If that step is still ahead of you, do it first — everything here builds on it.
Here is what you will have when this works: a third-party library importable inside your project, a confirmed interpreter path, and a requirements.txt file that records your project's dependencies so you can reinstall them later.
What You'll Have When This Works
Before touching a command, know the finish line. By the end of this article you will be able to:
- Install a package into your project's virtual environment — not into some other Python installation.
- Prove that
pipandpythonboth point at that environment. - Inspect what is actually installed and where it lives on disk.
- Record your dependencies in a
requirements.txtfile so the project can be rebuilt later.
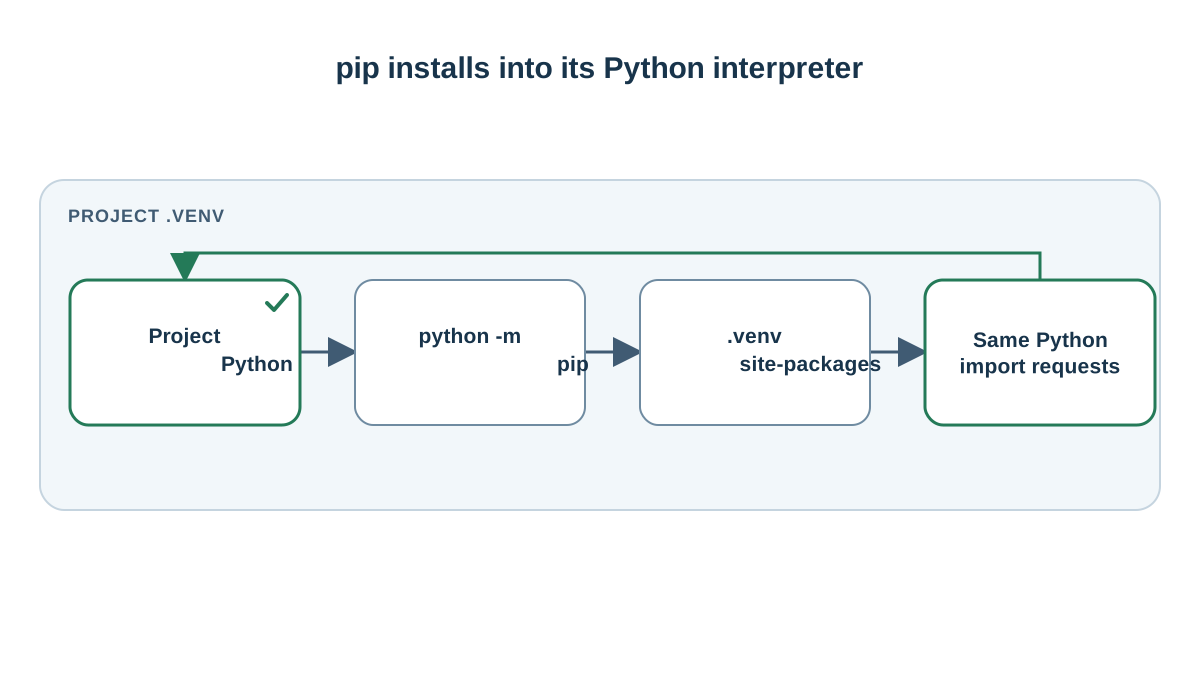
One mental model carries the entire article: pip installs into the interpreter it is bound to. The environment is not a side detail. The environment is the target.
Confirm You're Installing Into the Right Place
This is the step beginners skip, and it is the step that prevents the error from the opening. Do it before every install session, especially in a fresh terminal window.
First, ask Python where it lives:
python -c "import sys; print(sys.executable)"
If your environment is active, the path points inside your project's environment folder. On macOS or Linux it looks something like this:
/Users/you/projects/myproject/.venv/bin/python
On Windows:
C:\Users\you\projects\myproject\.venv\Scripts\python.exe
Notice the .venv segment. That is the proof. If instead you see something like /usr/bin/python3 or C:\Python312\python.exe, you are pointed at a system Python, and anything you install now goes there.
Second, ask pip which Python it belongs to:
python -m pip --version
pip 24.0 from /Users/you/projects/myproject/.venv/lib/python3.12/site-packages/pip (python 3.12)
The path in that output should match the environment you just confirmed. Two commands, same address.
Why python -m pip instead of plain pip
You will see pip install requests all over the internet. It usually works. But it relies on your shell finding the right pip executable on its PATH, and that is exactly the assumption that breaks.
python -m pip install requests removes the ambiguity. It says: run the pip module using this exact Python interpreter. Since you just verified that interpreter with sys.executable, pip is now bound to the environment you checked. The install cannot silently land somewhere else.
Tip: Make
python -m pipyour default habit. It costs four extra characters and eliminates an entire category of confusing bugs.
One more signal: your terminal prompt usually shows the environment name in parentheses, like (.venv) $. That is helpful, but it is not proof. Prompts can be stale, and a new terminal window may not have activated anything. The path is proof.
Knowledge check
Check your understanding
Answer this question before you continue.
Install Your First Package
Now the install itself. We will use requests, a small library for making HTTP requests. It is fast to install, and you will genuinely use it later for anything that talks to a web API.
python -m pip install requests
Collecting requests
  Downloading requests-2.31.0-py3-none-any.whl (62 kB)
Collecting charset-normalizer<4,>=2
Collecting idna<4,>=2.5
Collecting urllib3<3,>=1.21.1
Collecting certifi>=2017.4.17
Installing collected packages: urllib3, idna, charset-normalizer, certifi, requests
Successfully installed certifi-2024.2.2 charset-normalizer-3.3.2 idna-3.6 requests-2.31.0 urllib3-2.2.1
Read that output instead of skimming it. Collecting requests means pip found the package on the Python Package Index. The four lines after it are requests' own dependencies — libraries it needs to function. Installing collected packages lists everything being written to disk. Successfully installed names each package and its exact version.
Those extra packages are not a mistake. That is dependency resolution: pip read requests' metadata, found what it depends on, and installed the whole chain so the library actually works. You asked for one package and got five. That is normal.
Now prove the install landed in your environment:
python -c "import requests; print(requests.__version__)"
2.31.0
If that prints a version number, the package is importable by the interpreter you verified earlier. If it raises ModuleNotFoundError, go back to the sys.executable check — you are almost certainly pointed at a different Python.
Knowledge check
Check your understanding
Answer this question before you continue.
Install a Specific Version or Several Packages
The default install grabs the latest release. Sometimes you need a known-good version instead — maybe a tutorial targets it, or a newer release broke something your project relies on.
Pin an exact version with ==:
python -m pip install requests==2.31.0
If that version is already installed, pip notices and does nothing. If a different version is present, pip replaces it.
You can also install several packages in one command by listing them:
python -m pip install requests pandas openpyxl
And you can upgrade an existing package to the latest release:
python -m pip install --upgrade requests
Pinning versus ranges
You may also see range specifiers like requests>=2.0.0,<3.0.0, which mean "any 2.x release." They have their place, but for a beginner project the tradeoff is simple:
| Approach | Use this when | Beginner mistake |
|---|---|---|
requests==2.31.0 | The project must keep working the same way tomorrow | Forgetting that this freezes one exact version |
requests>=2.0.0,<3.0.0 | You are exploring and want compatible updates | Assuming "compatible" means "identical behavior" |
requests | Quick experiments only | Shipping an unpinned project and getting a surprise break later |
My rule: pin when the project must keep working; leave unpinned only while exploring. A pinned version is a promise you can keep. An unpinned one is a promise someone else can break for you.
Check What's Actually Installed
Do not trust memory. Inspect the environment's real state.
python -m pip list
Package            Version
------------------ -------
certifi            2024.2.2
charset-normalizer 3.3.2
idna               3.6
pip                24.0
requests           2.31.0
setuptools         69.1.1
urllib3            2.2.1
This lists every package in the active environment, including pip and setuptools, which came with the environment itself. Run the same command outside your environment and you will see a different, usually much longer list. That contrast is the lesson: the list is a property of the interpreter, not of your computer.
For detail on one package, use show:
python -m pip show requests
Name: requests
Version: 2.31.0
Summary: Python HTTP for Humans.
Home-page: https://requests.readthedocs.io
Author: Kenneth Reitz
License: Apache 2.0
Location: /Users/you/projects/myproject/.venv/lib/python3.12/site-packages
Requires: certifi, charset-normalizer, idna, urllib3
The field that matters most is Location. It should sit inside your environment's site-packages folder — the .venv segment again. That is the final proof that the install landed where you intended. Requires also shows you the dependency chain you saw during install, now recorded.
Knowledge check
Check your understanding
Answer this question before you continue.
Save Your Dependencies in requirements.txt
A working environment is good. A reproducible one is better. Right now your setup exists only on your machine, in a folder you should never commit to version control. If that folder disappears, your dependency list disappears with it.
pip freeze solves this. It prints installed packages in the exact format pip install expects:
python -m pip freeze
certifi==2024.2.2
charset-normalizer==3.3.2
idna==3.6
requests==2.31.0
urllib3==2.2.1
Redirect that into a file:
python -m pip freeze > requirements.txt
Open requirements.txt and read it. Every line is a package name, ==, and an exact version. Those pins record the current state of your environment — the packages you installed, plus the dependencies they pulled in.
To reinstall everything from the file — on a teammate's machine, or after you delete and recreate your environment:
python -m pip install -r requirements.txt
That single command is how a project travels. Keep requirements.txt in version control. Keep the environment folder out of it — it is large, machine-specific, and rebuildable from the file.
Note:
pip freezelists everything in the environment, including packages you installed while experimenting and no longer need. It captures the environment's installed set, not a curated list of what the project truly requires. When your file grows messy, recreate the environment and install only what the project actually uses.
Knowledge check
Check your understanding
Answer this question before you continue.
Common Mistakes and How to Recover
Most pip problems are one of five mistakes. Each has a concrete fix.
ModuleNotFoundError right after a successful install. This is almost always a different interpreter. Re-run python -c "import sys; print(sys.executable)" and compare it to the path pip reported. If they differ, activate the correct environment and install again.
Installing outside the environment. Symptoms include permission errors, a prompt asking for sudo, or packages showing up in a global pip list. Stop, activate your environment, and reinstall with python -m pip. The package you installed globally is still there; you may want to remove it later.
Forgetting to activate in a new terminal window. Environments are not remembered between shells. Open a new terminal and your prompt loses the (.venv) prefix — and your commands target the system Python again. Reactivate the environment before installing anything.
Hand-editing requirements.txt and breaking the format. A stray space, a typo in a version number, or a missing == will make pip install -r fail. Regenerate the file with pip freeze instead of guessing at the syntax.
Using sudo pip install or --user inside a project environment. Both defeat the isolation you set up. sudo writes to system locations, and --user writes to your personal user directory — neither touches your project environment. Inside an active environment, plain python -m pip install needs no elevated permissions at all.
What to Memorize and What to Look Up
Three commands belong in muscle memory:
python -m pip install <package>
python -m pip list
python -m pip freeze > requirements.txt
Everything else — version specifier syntax, index options, flags like --no-cache-dir — is fine to look up when you actually need it. You will not remember every flag, and you do not need to.
The habit that matters more than any flag: verify the interpreter before you install, and record dependencies after. Do those two things and the ModuleNotFoundError from the opening stops happening to you.
Your Next Move
Pick one library you actually want to use — something for a small script, a data cleanup task, or a web request. Install it with python -m pip install, confirm it with the sys.executable check and pip show, then freeze it into requirements.txt.
Then do the real test: delete your environment folder, recreate the environment, activate it, and run python -m pip install -r requirements.txt. If your import works afterward, you have not just installed a package. You have built a setup that survives being thrown away and rebuilt — which is exactly what a real project needs.
Knowledge check
Final check
Finish the article by checking the ideas you just learned.
References
Want a more structured Python path?
Use the Python Starter Pack to turn scattered tutorials into a focused practice path.
Python for Artificial Intelligence Starter Pack
Build a Python foundation you can actually use. The Python for AI Starter Pack brings together a guided path through setup, core programming concepts, data structures, files, JSON, APIs, debugging, and practical projects—so you can move quickly from running your first program to understanding and building useful software.
- 264-page illustrated PDF
- 12 guided Python chapters
- Visual concept diagrams
- Self-assessment quizzes
- Bonus deep-dive sections
- Files, JSON, APIs, debugging & projects
- Foundation for data, automation & AI
Coming soon


