
Python Virtual Environments for Beginners
You finish one project that uses version 1.0 of a handy library. You start a second project, and it needs version 2.0 of that same library. You install…

Key topics
You finish one project that uses version 1.0 of a handy library. You start a second project, and it needs version 2.0 of that same library. You install version 2.0, and suddenly your first project stops working. Same language. Same computer. Two projects that can't peacefully coexist.
This is the problem a Python virtual environment solves. It gives each project its own private workspace with its own Python and its own set of installed packages. No collisions. No breakage. Just clean, separate spaces for each thing you build.
Why Your Projects Need Their Own Space
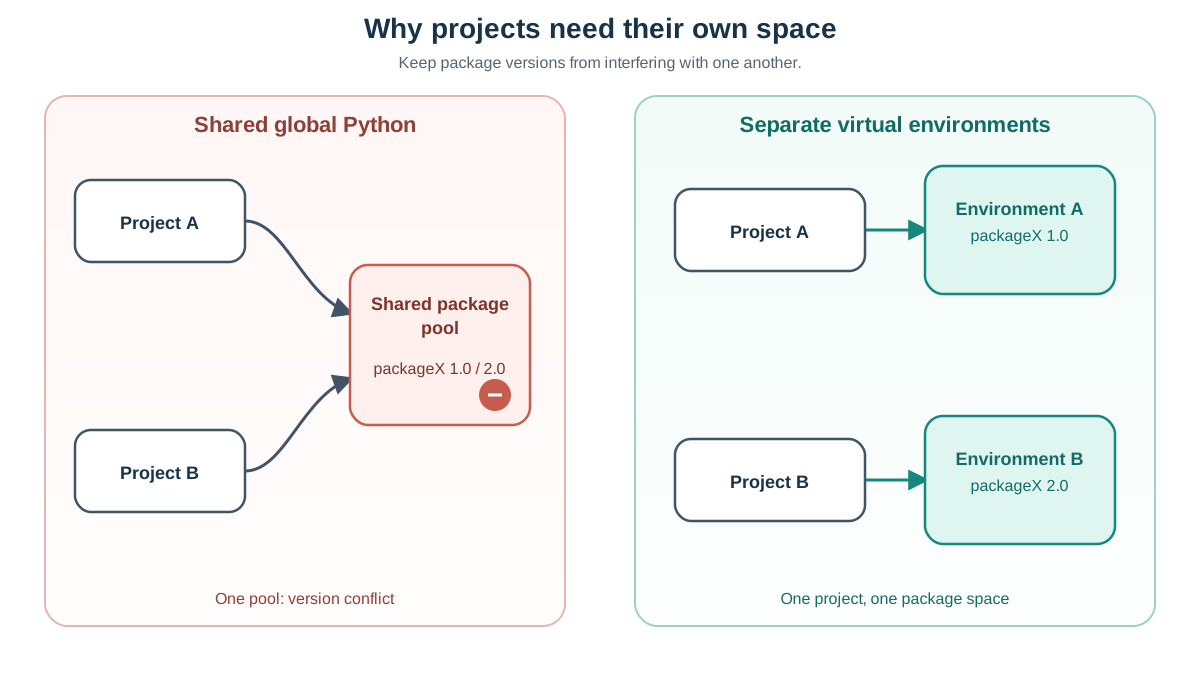
When you first install Python, you get one global installation. Every package you install with pip goes into that one shared pool. For a while, this works fine. You install a package, use it, and move on.
The trouble starts when your projects want different things. Project A needs packageX version 1.0. Project B needs packageX version 2.0, which changed how it works. Install version 2.0 for Project B, and Project A now runs code it wasn't designed for. Something breaks, and you spend an afternoon figuring out why.
A Python virtual environment fixes this by giving each project its own clean room. Instead of one shared kitchen where every project cooks with the same ingredients, each project gets its own private kitchen with exactly the ingredients it needs.
The best part? You don't need to install any extra tools. Python includes the venv module in the standard library, so it's available in Python 3.3 and later. If you have Python installed, you're ready to go.
Knowledge check
Check your understanding
Answer this question before you continue.
What a Virtual Environment Actually Is
A virtual environment is just a folder. You'll usually name it venv or .venv, and you'll place it inside your project folder.
That folder holds everything your project needs to run independently:
- Its own Python interpreter
- Its own copy of
pipfor installing packages - Its own
site-packagesfolder where installed libraries live
Your virtual environment shares the standard library with your base Python installation, but third-party packages stay separate. Packages you install inside the environment don't touch your global Python, and packages in your global Python don't leak into the environment.
Here's what matters most: the environment folder is disposable. You can delete it and recreate it anytime. Your actual project code never lives inside it. Think of the environment as a workspace you can clean out and rebuild, not as part of your project itself.
Knowledge check
Check your understanding
Answer this question before you continue.
Create Your First Virtual Environment
Before you create your first virtual environment, make sure you have Python installed and you know how to open a terminal or command prompt. If either prerequisite is missing, complete that setup first.
Start by creating a folder for your project and moving into it:
mkdir my-project
cd my-project
Now create your virtual environment:
python -m venv venv
Let's break down that command:
pythonruns your Python interpreter-mtells Python to run a modulevenvis the module that creates virtual environmentsvenvat the end is the name of the folder being created
On some systems, you might need to use python3 instead of python:
python3 -m venv venv
After the command finishes, you'll see a new folder called venv inside your project. That's your virtual environment.
Knowledge check
Check your understanding
Answer this question before you continue.
Activate the Environment
Creating the environment isn't enough. You also need to activate it so your terminal knows to use this environment's Python instead of your global one.
The command depends on your operating system.
On Windows, using the Command Prompt:
venv\Scripts\activate
On Windows, using PowerShell:
venv\Scripts\Activate.ps1
On Mac or Linux:
source venv/bin/activate
How do you know it worked? Your terminal prompt will change to show the environment name in parentheses:
(venv) your-name@your-computer:~/my-project$
That (venv) prefix is your signal that the environment is active. Everything you install now goes into this environment, not your global Python.
One important note: activation only lasts for your current terminal session. When you close the terminal and open a new one, you'll need to activate the environment again.
Knowledge check
Check your understanding
Answer this question before you continue.
Verify It Is Working
Before installing anything, let's confirm the environment is actually doing its job.
First, check which Python your terminal is using. On Mac or Linux:
which python
On Windows:
where python
The path should point inside your venv folder, something like:
/home/your-name/my-project/venv/bin/python
Now check what packages are installed:
pip list
You should see only a small default set of packages:
Package    Version
---------- -------
pip        24.0
That short list proves your environment starts clean. Compare it to your global Python's package list, and you'll see the difference. Your global Python probably has packages you installed for other projects. Your new environment has almost nothing, which is exactly what you want.
Install a Package and Use It
Now let's prove the isolation is real. With your environment active, install a small package. We'll use cowsay, a fun package that draws a cow saying whatever you type:
pip install cowsay
Now create a tiny script that uses it. Make a file called hello.py in your project folder:
import cowsay

cowsay.cow("Hello from my virtual environment!")
Run the script:
python hello.py
You'll see a cow greeting you:
  _______________________________
| Hello from my virtual environment! |
  ===============================
                                 \
                                  \
                                    ^__^
                                    (oo)\_______
                                    (__)\       )\/\
                                        ||----w |
                                        ||     ||
Here's the key point: cowsay is only available while your environment is active. Deactivate the environment with deactivate, try running the script again, and you'll get an error because the package isn't installed in your global Python.
That's not a bug. That's the isolation working exactly as designed.
Common Beginner Mistakes
Every beginner hits a few of these. Here's how to recover quickly.
Forgetting to activate before installing. If you run pip install without activating your environment, packages go into your global Python. Always check for the (venv) prefix in your prompt before installing.
Creating the environment but never activating it. The folder exists, but your terminal is still using global Python. Run the activation command for your system.
Using sudo with pip inside a virtual environment. You don't need admin privileges inside a virtual environment, and sudo can cause permission problems. If you're in an active environment, plain pip install is all you need.
Putting project code inside the environment folder. The venv folder is for the environment, not your code. Keep your scripts and project files in the project folder, next to the environment, not inside it.
Worrying about deleting the environment. If you delete the venv folder, you can recreate it anytime with the same command. Your project code stays safe because it lives outside the environment.
When to Use a Virtual Environment (and When Not To)
Here's a simple rule to live by: if you're about to pip install something for a project, create and activate a virtual environment for that project first.
Use a virtual environment for any project where you install third-party packages. Use one before you start a project that will grow, so you never fight version conflicts later. This is a normal habit for real Python work, not an advanced ceremony.
Do you need one for a quick one-off script that only uses Python's standard library? Not really. If you're just experimenting in the interactive interpreter or writing a short script that imports only built-in modules, a virtual environment adds little value.
The habit to build is simple: the moment a project needs a package you didn't write, give that project its own environment. It costs you one command to create and one command to activate. It saves you from debugging sessions that can eat an entire afternoon.
Your Next Step
Here's your assignment: the next time you start a project that needs a third-party package, create and activate a virtual environment before you install anything. Run pip list first to see the clean slate. Install your package. Watch the (venv) prefix stay in your prompt. That's the whole workflow.
Once you're comfortable with virtual environments, the natural next step is learning how to manage your project's packages properly. You'll want to know how to list what you've installed, upgrade packages safely, and share your project's dependencies with others. But for now, enjoy the clean room you've built. Your future projects will thank you.
Knowledge check
Final check
Finish the article by checking the ideas you just learned.
References
Research updated Sep 5, 2026
Want a more structured Python path?
Use the Python Starter Pack to turn scattered tutorials into a focused practice path.
Python Starter Pack
A compact LearnPyFast PDF pack covering what Python is, installation, your first program, running Python code, and Python versions.
- 5 curated chapters
- Enhanced PDF edition with bundle-only learning guidance
- Offline-friendly format for focused review
- Source article links for future online updates
Coming soon


